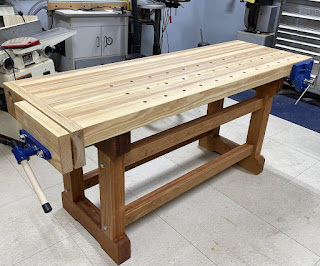
Plans for Building Furniture for Every Skill Level

Building Furniture: A Project for Every Skill Level

So, you've got the itch to build something. Maybe you're dreaming of a stunning, handcrafted dining table, or perhaps a simple, rustic shelf would do the trick. Whatever your vision, building your own furniture is incredibly rewarding, and surprisingly accessible, no matter your skill level. Let's explore some projects perfect for beginners, intermediate crafters, and seasoned pros!

Beginner-Friendly Furniture Projects: Small Wins, Big Confidence

Don't let the idea of woodworking intimidate you. Starting small is key to building confidence and mastering the basics. These projects are perfect for getting your feet wet (and maybe a little sawdust on your clothes!).

Simple Shelves: The Perfect Starter Project

Shelving units are fantastic beginner projects because they're straightforward, require relatively few tools, and offer tons of customization. You can use pre-cut lumber from your local hardware store to make it even easier. Focus on straight cuts and accurate measurements, and you'll be amazed at how quickly you can build a functional and stylish shelf!

What you'll need: Pre-cut lumber (pine is a great option), wood glue, screws, drill, level, and a simple measuring tape.

A Basic Coat Rack: Functional & Stylish

This project is all about simple joinery and provides great practice with drilling pilot holes and screwing wood together. You can get creative with the style, using reclaimed wood for a rustic look or painted wood for a modern feel. Plus, it's super practical!

What you'll need: Wood dowels, wood planks, wood glue, screws, drill, sandpaper, and paint or stain (optional).

A Rustic Side Table: Easy Assembly

Many pre-made kits for side tables are available, making assembly a breeze. These kits often come with all the necessary hardware and clear instructions. They're a fantastic way to learn about different wood types and how to assemble furniture quickly. And if you mess up? It's easy to start again!

What you'll need: A pre-made side table kit, screwdriver, and possibly a hammer (depending on the kit).

Intermediate Projects: Stepping Up Your Game

Once you've mastered the basics, you can move on to projects that require more advanced techniques and tools. These projects will test your skills and help you become more comfortable with more complex designs.

A Coffee Table with Drawers: Adding Complexity

Building a coffee table with drawers involves creating rabbet joints or dovetail joints (if you're feeling ambitious!), which require more precise cutting and assembly. This project will hone your skills in joinery, finishing, and adding hardware.

What you'll need: Wood planks (consider hardwood for durability), wood glue, screws, drawer slides, a table saw (or a hand saw and lots of patience!), router (optional for decorative edges), and finishing supplies.

A Headboard for Your Bed: Creative Expression

Headboards are a fantastic opportunity to get creative! You can use different wood types, create interesting shapes, and incorporate unique finishing touches. This project will challenge you to think about design and functionality while working with larger pieces of wood.

What you'll need: Wood planks, wood glue, screws, possibly upholstery foam and fabric (for a padded headboard), and finishing supplies.

A Simple Bench: Mastering Wood Finishing

Building a bench offers the chance to master wood finishing techniques. Whether you want a sleek, modern finish or a rustic, weathered look, this project is all about the details. Practice sanding, staining, and sealing to achieve a professional-looking finish.

What you'll need: Wood planks (consider using thicker boards for a more sturdy bench), wood glue, screws, clamps (very helpful!), sandpaper, stain, sealant, and potentially a planer for smoother surfaces.

Advanced Furniture Projects: For the Experienced Craftsman

If you're a seasoned woodworker, you're ready to tackle ambitious projects that will truly test your skills and creativity. These projects require precision, advanced techniques, and a high level of comfort with woodworking tools.

A Custom Dining Table: The Ultimate Challenge

A custom dining table is the ultimate woodworking achievement. This project often involves creating complex joinery, working with large pieces of wood, and meticulously crafting a beautiful and functional piece of furniture. Consider using intricate joinery techniques like mortise and tenon joints for exceptional strength and stability.

What you'll need: High-quality hardwood (like oak or walnut), a full range of woodworking tools (including a planer, jointer, and possibly a router), specialized joinery tools, clamps, and high-quality finishing supplies.

A Built-in Bookshelf: Planning & Precision

Built-in bookshelves require careful planning, precise measurements, and skillful execution. You'll need to work with wall studs, ensuring stability and strength. This is a project that truly integrates furniture into your home's architecture.

What you'll need: Wood planks, a stud finder, a level, a saw, a drill, measuring tape, and possibly a router for decorative elements. This project often benefits from design software to plan the layout carefully.

A Hand-Carved Chair: Artistic Mastery

Hand-carving a chair is the pinnacle of woodworking skill. This involves not only precise joinery but also artistic skill and creativity. You'll need a deep understanding of wood grain, joinery, and the ability to translate a design into three dimensions.

What you'll need: High-quality hardwood, a variety of carving tools, chisels, mallets, sandpaper, and a lot of patience!

Frequently Asked Questions

Q: What are the essential tools for beginner woodworking?

A: A measuring tape, a pencil, a saw (hand saw or circular saw), a drill, a screwdriver, sandpaper, wood glue, clamps, and safety glasses are a great starting point.

Q: What type of wood is best for beginners?

A: Pine is a popular choice for beginners due to its affordability and ease of working with. It's soft, relatively easy to cut, and forgiving of mistakes.

Q: Where can I find woodworking plans?

A: There are countless woodworking plans available online (search for "free woodworking plans"), in magazines, and in books. Choose plans that match your skill level and desired outcome.

Q: How important is safety?

A: Safety is paramount! Always wear safety glasses, use appropriate hearing protection when using power tools, and follow all safety instructions for your tools. Take your time and don't rush the process.

Q: What if I make a mistake?

A: Don't worry, everyone makes mistakes! Woodworking is a learning process. Sometimes, mistakes can be easily fixed, and sometimes you might need to start over. Learn from your mistakes and keep practicing.

So there you have it! Whether you're a complete novice or an experienced craftsperson, there's a woodworking project out there waiting for you. Get started, have fun, and enjoy the process of creating something beautiful and lasting with your own two hands!

Share:

DIY It Yourself Furniture Plans for Handmade Creations

Unleash Your Inner Craftsperson: DIY Furniture Plans for Stunning Handmade Creations

Tired of mass-produced furniture that lacks character and personality? Yearning to create something unique and beautiful for your home? Then dive into the rewarding world of DIY furniture! With the right plans and a little elbow grease, you can craft bespoke pieces that reflect your style and enhance your living space. Forget generic store-bought pieces – let's build something truly extraordinary.

Choosing Your Perfect DIY Furniture Project

The journey begins with selecting the right project. Don't jump into a complex design on your first attempt. Start with something manageable, building confidence and skills as you progress. Consider your skill level, available tools, and the desired outcome. A simple bedside table or a charming bookshelf might be ideal for beginners, while experienced crafters might tackle a more ambitious project like a dining table or a custom-built wardrobe.

Beginner-Friendly Furniture Projects:

  • Floating Shelves: These require minimal tools and offer a fantastic introduction to woodworking techniques.
  • Simple Coffee Table: A straightforward design allows you to focus on mastering basic joinery techniques.
  • Headboard: Provides an opportunity to explore upholstery or unique material choices.

Finding Reliable DIY Furniture Plans

The internet is a treasure trove of DIY furniture plans, but finding reliable and well-documented ones is crucial. Look for plans that provide detailed instructions, clear diagrams, and comprehensive material lists. Websites specializing in woodworking, reputable blogs by experienced DIYers, and online marketplaces often offer excellent resources. Pay attention to reviews and ratings before committing to any plan. Don't hesitate to check multiple sources to ensure accuracy and completeness. Remember, a well-written plan will significantly ease the construction process.

Essential Considerations When Choosing Plans:

  • Clarity of Instructions: Choose plans with step-by-step instructions that are easy to understand.
  • Detailed Diagrams: Clear diagrams are essential for visualizing the project and understanding assembly.
  • Material List: Ensure the plan provides a complete list of materials with specific dimensions.
  • Skill Level Assessment: Select plans appropriate for your current skill level to avoid frustration.

Gathering Your Tools and Materials

Once you've selected your project, gather all necessary tools and materials. This crucial step prevents delays and ensures a smoother build. Don't skimp on quality tools; they'll make a significant difference in the precision and overall outcome of your project. Accurately measure and cut all materials according to the plan's specifications. Precise cuts are fundamental to achieving a professional-looking finish. Organize your workspace efficiently; a well-organized area minimizes errors and maximizes productivity.

Essential Tools for Most DIY Furniture Projects:

  • Measuring Tape: Accurate measurements are paramount.
  • Saw (circular saw, jigsaw, hand saw): For cutting wood to size.
  • Drill: For creating pilot holes and driving screws.
  • Screwdriver (various sizes): Essential for assembling furniture.
  • Sandpaper: For smoothing surfaces and achieving a refined finish.

Building Your Dream Furniture: Step-by-Step Guidance

Follow the chosen plan meticulously, paying close attention to each step. Take your time and don't rush the process. Double-check measurements before making any cuts or joining components. If you encounter any difficulties, don't hesitate to seek assistance online or consult with experienced woodworkers. Remember, patience and perseverance are key to success. Celebrate each milestone achieved, and appreciate the satisfaction of creating something beautiful with your own hands.

Embrace the journey! The process of building your own furniture is as rewarding as the finished product. Enjoy the challenge, the learning experience, and the immense pride of creating something unique and lasting for your home. Your handmade creation will not only serve its purpose but also serve as a testament to your skills and creativity.

Share:

DIY Wright Furniture Plans for Elegant Wood Creations

DIY Wright Furniture Plans for Elegant Wood Creations

Embrace the artistry of Frank Lloyd Wright's iconic designs and craft your own stunning furniture pieces with detailed DIY plans. This article explores the world of handcrafted, Wright-inspired furniture, guiding you through the process of selecting plans, gathering materials, and mastering the techniques to create elegant, functional pieces that reflect Wright's unique aesthetic. Forget mass-produced furniture; discover the satisfaction of building heirloom-quality pieces for your home, imbued with your personal touch.

Choosing the Perfect Wright-Inspired Plan

The journey to creating your own Wright-inspired masterpiece begins with careful plan selection. Numerous resources offer detailed blueprints and instructional guides, catering to various skill levels. Websites dedicated to woodworking, architectural plans, and DIY projects offer a wealth of options. Consider your skillset when choosing a plan; a simple side table will differ greatly in complexity from a full dining set. Look for plans that provide clear, step-by-step instructions, detailed diagrams, and material lists. Don't underestimate the value of a well-illustrated plan; a picture truly is worth a thousand words when it comes to understanding intricate joinery techniques.

Key Factors to Consider When Selecting a Plan:

  • Complexity: Choose a project that matches your woodworking experience.
  • Material Requirements: Ensure you can easily source the specified wood types and hardware.
  • Tool Requirements: Verify you possess the necessary tools or have access to them.
  • Style Preference: Select a design that complements your existing décor.
  • Plan Clarity: Opt for plans with comprehensive instructions and clear diagrams.

Gathering Your Materials and Tools

Once you've chosen your plan, meticulously gather the necessary materials. Accuracy is paramount. Obtain high-quality wood that aligns with the plan's specifications. Consider the type of wood – its durability, workability, and aesthetic appeal. Hardwoods such as oak, cherry, or walnut offer exceptional strength and beauty, but may require more skill to work with. Softer woods, like pine, are easier to manipulate but might lack the same longevity. Remember to account for waste and always buy slightly more lumber than the plan specifies.

In addition to wood, acquire all required hardware: screws, dowels, wood glue, finishing materials (stain, varnish, or paint), and any specialized fasteners mentioned in your plans. Inspect your tools before starting. Ensure your saws are sharp, your drill bits are in good condition, and your measuring tools are accurate. A well-maintained workshop is crucial for efficient and safe woodworking.

Mastering the Techniques: Building Your Wright-Inspired Furniture

With your materials and tools ready, meticulously follow the plan's instructions. Take your time, focusing on precision at every step. Pay close attention to joinery techniques, ensuring strong, accurate connections. Wright's designs often incorporate clean lines and geometric shapes; accuracy in cutting and assembly is key to achieving this signature aesthetic. Don't rush the process. Careful measurement and methodical execution will result in a superior finished product.

If you encounter difficulties, don't hesitate to consult online resources, woodworking forums, or experienced craftspeople. Many online communities provide support and advice for DIY projects. Embrace the learning process; even experienced woodworkers encounter challenges. The rewards of creating a beautiful, functional piece of furniture far outweigh any temporary setbacks.

Finishing Touches and Proudly Displaying Your Creation

Once the construction is complete, carefully sand all surfaces to achieve a smooth finish. Then apply your chosen finish – stain, varnish, or paint – following the manufacturer's instructions. Consider the overall aesthetic of the piece when choosing a finish. A natural wood stain might highlight the grain and character of the wood, while a paint finish could create a bolder statement. Allow ample drying time between coats.

Finally, stand back and admire your handcrafted masterpiece. The feeling of accomplishment from building your own Wright-inspired furniture is unparalleled. Display your creation proudly, knowing that it's a testament to your skills, dedication, and appreciation for iconic design. This piece will not only add beauty to your home but also serve as a lasting reminder of your woodworking journey.

Share:

Furniture Business Plans for a Successful Startup

Furniture Business Plans for a Successful Startup

Launching a successful furniture business requires meticulous planning and execution. This comprehensive guide outlines key elements of a robust business plan, crucial for securing funding, guiding operations, and achieving long-term profitability. The furniture industry is competitive, demanding a strong understanding of market trends, consumer preferences, and efficient operational strategies.

Executive Summary

This section provides a concise overview of the entire business plan. It should highlight the company's mission, vision, target market, competitive advantages, financial projections, and funding requests (if applicable). It serves as a compelling introduction, summarizing the key aspects of the plan and enticing potential investors or lenders.

Key Highlights of the Executive Summary:

  • Company Description and Mission Statement
  • Products and Services Offered
  • Target Market Analysis
  • Competitive Landscape and Differentiation Strategy
  • Marketing and Sales Strategy
  • Financial Projections (revenue, expenses, profitability)
  • Funding Request (if applicable)

Company Description

This section details the legal structure of the business (sole proprietorship, partnership, LLC, corporation), its location, and its overall mission and vision. It should articulate the company's values and long-term goals, setting the foundation for all subsequent operational decisions. A clearly defined mission statement provides a guiding principle for all activities.

Legal Structure and Ownership:

Clearly define the legal structure, highlighting the advantages and disadvantages of the chosen structure concerning liability, taxation, and ease of operation. Specify the ownership structure and the roles and responsibilities of key personnel.

Mission and Vision Statements:

Articulate a concise and impactful mission statement that defines the company's purpose and core values. The vision statement outlines the long-term aspirations and desired future state of the business.

Market Analysis

A thorough market analysis is critical for understanding the industry landscape, identifying target customers, and assessing competition. This section requires substantial research, utilizing both primary and secondary data sources to paint a comprehensive picture of the market dynamics.

Target Market Identification:

Define the specific customer segments the business will target. Consider factors such as demographics (age, income, location), psychographics (lifestyle, values, interests), and buying behavior. Creating detailed customer personas can be beneficial.

Competitive Analysis:

Identify key competitors and analyze their strengths, weaknesses, pricing strategies, and market share. Assess the competitive landscape and determine how the new business will differentiate itself and gain a competitive advantage. This could involve offering unique designs, superior quality, exceptional customer service, or competitive pricing.

Market Trends and Opportunities:

Analyze current and emerging trends in the furniture industry. Identify opportunities to capitalize on these trends and develop innovative products or services that meet evolving customer needs. Consider sustainable practices and the growing demand for eco-friendly furniture.

Products and Services

This section outlines the specific furniture items or services offered. Include detailed descriptions, specifications, pricing strategies, and sourcing information. High-quality product photography is essential to showcase the offerings.

Product Line Description:

Provide comprehensive descriptions of each furniture piece or collection, highlighting unique features, materials used, and craftsmanship. Include dimensions, colors, and available options.

Sourcing and Manufacturing:

Detail the sourcing strategy for materials and components. Explain whether the furniture will be manufactured in-house, outsourced to a third-party manufacturer, or a combination of both. Discuss quality control measures and ethical sourcing practices.

Pricing Strategy:

Outline the pricing model, explaining how prices are determined and justified. Consider factors such as cost of goods sold, desired profit margin, competitive pricing, and perceived value.

Marketing and Sales Strategy

This section details the plan to reach target customers and generate sales. It should include a mix of online and offline marketing tactics, a sales process, and customer relationship management (CRM) strategies.

Branding and Positioning:

Develop a strong brand identity that resonates with the target market. Define the brand's personality, values, and unique selling proposition (USP). Choose a memorable brand name and logo.

Marketing Channels:

Outline the specific marketing channels that will be utilized, including social media marketing, search engine optimization (SEO), pay-per-click (PPC) advertising, email marketing, content marketing, public relations, and potentially partnerships with interior designers or architects.

Sales Process:

Describe the sales process from initial customer contact to order fulfillment. This may include online sales, in-store sales, or a combination of both. Consider offering personalized consultations or design services.

Customer Service:

Detail the strategies for providing exceptional customer service, including order tracking, delivery, assembly, and post-sales support. Excellent customer service is crucial for building brand loyalty and positive word-of-mouth referrals.

Management Team

This section introduces the individuals who will lead the business. Highlight their experience, skills, and expertise relevant to the furniture industry. A strong management team is crucial for success.

Key Personnel:

Provide biographies of key personnel, including their roles, responsibilities, and relevant experience. Highlight any relevant industry experience or entrepreneurial success.

Organizational Structure:

Illustrate the organizational chart, depicting the reporting structure and responsibilities within the company.

Financial Projections

This section presents the financial forecasts for the business, including projected revenue, expenses, and profitability. Accurate financial projections are essential for securing funding and making informed business decisions.

Start-up Costs:

Detail all start-up costs, including inventory, equipment, marketing expenses, and rent or leasehold improvements.

Funding Request (if applicable):

If seeking funding, clearly state the amount of funding needed, how the funds will be used, and the proposed return on investment (ROI) for investors.

Projected Income Statement, Balance Sheet, and Cash Flow Statement:

Provide detailed financial projections for at least three years, showing anticipated revenue, expenses, net income, assets, liabilities, and cash flow. These projections should be realistic and based on sound assumptions.

Appendix

This section includes supporting documents, such as market research data, resumes of key personnel, letters of intent from suppliers or distributors, and permits or licenses.

By meticulously developing and adhering to a comprehensive business plan, furniture startups significantly increase their chances of success. Remember that the plan is a living document, requiring regular review and updates to adapt to changing market conditions and business realities. Continuous monitoring of key performance indicators (KPIs) and timely adjustments will be crucial for navigating the competitive furniture market and achieving sustainable growth.

Share:

Step-by-Step 4x4 Furniture Plans for Strong and Durable Pieces

Comprehensive Guide to Constructing Robust 4x4 Furniture

This document provides a detailed, step-by-step guide to designing and building strong, durable furniture using 4x4 lumber. It outlines essential considerations for material selection, joinery techniques, finishing processes, and safety protocols to ensure the longevity and structural integrity of your projects. While the focus is on 4x4 lumber, the principles discussed are adaptable to other dimensional lumber sizes.

I. Material Selection and Preparation

A. Choosing the Right Lumber

The success of any woodworking project hinges on the quality of the materials used. When selecting 4x4 lumber for furniture construction, prioritize the following:

  • Species: Hardwoods such as oak, maple, or cherry offer superior strength, durability, and aesthetic appeal compared to softwoods like pine or fir. However, hardwoods are generally more expensive and challenging to work with. Consider the intended use and your skill level when making your selection. For high-stress applications, hardwoods are recommended.
  • Grade: Lumber grades indicate the quality and consistency of the wood. Select lumber with minimal knots, checks, or other imperfections. Look for a grade appropriate for furniture construction; higher grades will generally yield better results.
  • Moisture Content: Accurately assessing moisture content is crucial. Lumber that is too wet will shrink and warp over time, compromising the structural integrity of your furniture. Aim for a moisture content of 6-8% for indoor furniture. Use a moisture meter to verify.
  • Straightness: Ensure the lumber is straight and free from significant bow or twist. Minor imperfections can often be corrected, but significant deviations will hinder construction and compromise the finished product.

B. Pre-Construction Preparation

Before commencing construction, meticulously prepare your lumber. This step is essential for ensuring accurate cuts and a professional finish:

  • Planing: Use a hand plane or jointer to flatten any uneven surfaces on the 4x4s. This ensures consistent dimensions and smooth joints.
  • Squaring: Employ a square to ensure all faces and edges of the 4x4s are at 90-degree angles. Use a hand plane or jointer to correct any deviations.
  • Cutting: Accurately cut the 4x4s to the precise dimensions outlined in your plans. A miter saw or chop saw offers the best accuracy for this step.
  • Sanding: Sand all surfaces to remove any splinters or rough edges. Start with coarser sandpaper and gradually move to finer grits for a smoother finish. Begin with 80-grit and progress to 120, 150, and finally 220-grit sandpaper for optimal smoothness.

II. Joinery Techniques for 4x4 Furniture

Choosing the appropriate joinery technique is paramount for creating strong and durable furniture. Several methods are suitable for 4x4 lumber, each with its own advantages and disadvantages:

A. Mortise and Tenon Joints

Mortise and tenon joints are a classic woodworking technique that offers exceptional strength and stability. For 4x4 lumber, a through-tenon joint is generally preferred. This involves cutting a mortise (hole) in one piece and a tenon (projection) on the other, which fit together tightly. Precise cutting is essential for a strong, accurate joint. Use a chisel, router, or mortising machine for creating the mortises and tenons.

B. Butt Joints with Reinforcement

Butt joints, while simple to create, are inherently weaker than other joint types. When used with 4x4 lumber, they require substantial reinforcement to ensure durability. Methods for reinforcing butt joints include:

  • Bolting: Use high-strength bolts and washers to secure the joint. Pre-drill pilot holes to prevent splitting the wood.
  • Doweling: Wooden dowels provide excellent strength and stability when properly installed. Use wood glue in conjunction with dowels for enhanced bonding.
  • Metal Plates: These are particularly useful for high-stress areas. Select plates appropriate for the load-bearing requirements of your project.

C. Half-Lap Joints

Half-lap joints are relatively simple to create and provide good strength, particularly when reinforced with screws or dowels. This technique involves cutting a half-depth notch into each piece of lumber, allowing them to interlock. Accurate measurement and cutting are essential for a tight, secure fit.

III. Assembly and Finishing

A. Assembly Procedures

Once all the components are prepared and the joinery is complete, assemble the furniture carefully. Use clamps to hold the pieces in place while the glue cures. Follow the instructions in your chosen plans meticulously to ensure proper alignment and structural integrity. Allow adequate drying time for the glue before proceeding to the next step.

B. Finishing Techniques

Finishing protects the furniture from moisture, damage, and decay, enhancing both its appearance and longevity. Several finishing options are available:

  • Staining: Staining enhances the natural wood grain and color. Select a stain that complements the wood species and your desired aesthetic.
  • Sealing: A sealant protects the wood from moisture and wear. Apply multiple coats for optimal protection.
  • Varnishing/Lacquering: Varnishes and lacquers provide a durable, protective finish that resists scratches and scuffs.
  • Painting: Painting is a cost-effective method to conceal imperfections and achieve a specific color.

Always follow the manufacturer's instructions for each finishing product. Ensure adequate ventilation during application and allow ample drying time between coats.

IV. Safety Precautions

Woodworking involves inherent risks. Always prioritize safety by adhering to the following guidelines:

  • Eye Protection: Wear safety glasses or a face shield at all times.
  • Hearing Protection: Use earplugs or earmuffs when operating power tools.
  • Dust Mask: Wear a dust mask to prevent inhalation of wood dust.
  • Proper Tool Use: Always follow the manufacturer's instructions for each tool and ensure it is in good working order.
  • Work Area: Maintain a clean and organized work area to minimize the risk of accidents.
  • First Aid: Have a well-stocked first-aid kit readily available.

By following these guidelines, you can significantly reduce the risk of injury during the construction process. Remember, safety should always be your top priority.

Constructing durable and aesthetically pleasing 4x4 furniture requires careful planning, precise execution, and a commitment to safety. This guide provides a solid foundation for embarking on such projects. Remember to always consult detailed plans and adapt the techniques presented here to your specific design and material choices. With dedication and attention to detail, you can create lasting pieces that enhance your home for years to come.

Share:

DIY Hutch Furniture Plans for Classic and Modern Homes

DIY Hutch Furniture Plans for Classic and Modern Homes

The hutch, a versatile and adaptable piece of furniture, has graced homes for centuries. From its humble beginnings as a simple storage unit to its modern iterations as a stylish focal point, the hutch continues to offer both practicality and aesthetic appeal. This article delves into the construction of DIY hutches, providing detailed plans suitable for both classic and modern home styles. We will explore various design considerations, material choices, and construction techniques to empower you to create a unique and personalized hutch for your space.

Planning Your DIY Hutch Project

Before embarking on your DIY hutch journey, meticulous planning is crucial. This phase will determine the success and satisfaction of your project. Consider the following aspects:

Defining Your Style and Functionality

The first step is to clearly define the style and intended functionality of your hutch. Are you aiming for a rustic, classic, or modern aesthetic? Will it primarily serve as display space, storage, or a combination of both? A classic hutch might incorporate ornate detailing, while a modern hutch could feature clean lines and minimalist design. Consider the existing décor of your home and select a style that complements it seamlessly. Functionality should also be a key driver. Decide on the number of shelves, drawers, and doors required to meet your storage needs. Sketching preliminary designs can help visualize the final product and refine your vision.

Choosing the Right Materials

Material selection significantly impacts the overall look, durability, and cost of your hutch. Popular choices include:

  • Wood: Offers a timeless appeal and is available in a wide variety of species, each with unique characteristics and price points. Hardwoods like oak, maple, and cherry are durable and aesthetically pleasing but more expensive. Softwoods such as pine and fir are more affordable but may require more careful handling.
  • Plywood: A cost-effective alternative to solid wood, plywood offers excellent stability and is suitable for both interior and exterior applications. Choose a high-quality plywood with a smooth finish for optimal results.
  • MDF (Medium-Density Fiberboard): A relatively inexpensive material that can be easily painted or stained. However, it is less durable than wood and more susceptible to damage. MDF is best suited for less demanding applications.
  • Metal: For a modern industrial look, consider metal framing or accents. Metal offers durability and clean lines, but requires specific tools and expertise for construction.

Determining Dimensions and Measurements

Precise measurements are paramount to ensure the hutch fits your designated space and meets your storage requirements. Carefully measure the available space, considering factors such as ceiling height, wall outlets, and surrounding furniture. Create detailed drawings with accurate dimensions for all components, including shelves, doors, drawers, and the overall structure. This detailed plan will serve as your blueprint throughout the construction process. Don't forget to account for the thickness of materials when calculating overall dimensions.

Constructing Your DIY Hutch: Classic Style

A classic hutch often evokes a sense of warmth and tradition. Construction typically involves traditional joinery techniques and a focus on ornate details.

Classic Hutch Design Elements

Classic hutches often feature:

  • Raised panel doors: These doors add a touch of elegance and sophistication.
  • Ornate molding and trim: Detailed molding enhances the overall aesthetic appeal.
  • Turned legs or feet: These add a touch of classic charm.
  • Glass-paned doors: Allow for the display of cherished items.
  • Multiple shelves: Provide ample storage space.

Construction Techniques for Classic Hutches

Traditional joinery techniques, such as mortise and tenon joints, dovetail joints, and dowel joints, are often employed in classic hutch construction. These techniques create strong, durable joints that enhance the longevity and stability of the piece. The use of wood glue and clamps is essential to ensure a secure bond between components. Sanding and finishing are crucial steps to achieve a smooth, polished surface and to protect the wood from damage.

Constructing Your DIY Hutch: Modern Style

Modern hutches prioritize clean lines, minimalist designs, and functionality. Construction often involves simpler joinery techniques and a focus on sleek aesthetics.

Modern Hutch Design Elements

Modern hutches often feature:

  • Simple, straight lines: Eliminating ornate detailing contributes to a clean look.
  • Sleek metal hardware: Adds a touch of industrial chic.
  • Open shelving: Creates a sense of spaciousness and allows for the display of items.
  • Integrated lighting: Highlights displayed items and enhances the overall aesthetic.
  • Minimalist color palette: Neutrals or bold monochromatic colors contribute to a contemporary vibe.

Construction Techniques for Modern Hutches

Modern hutch construction often utilizes simpler joinery methods, such as pocket hole joinery, butt joints reinforced with screws, or dado joints. These techniques are quicker and easier to execute than traditional joinery. The use of plywood or MDF can streamline the construction process. A focus on precision cutting and clean lines is paramount to achieve the desired minimalist aesthetic. A simple finish, such as a clear coat or a single coat of paint, completes the project.

Finishing Touches and Safety Considerations

Regardless of the chosen style, several finishing touches and safety considerations are critical:

Finishing Your Hutch

Proper finishing enhances both the appearance and durability of your hutch. This may involve sanding to achieve a smooth surface, applying a stain or paint, and applying a protective sealant or varnish. Consider using high-quality finishes that are appropriate for the chosen material. Ensure adequate ventilation during the finishing process to avoid inhaling harmful fumes.

Safety Precautions

Always prioritize safety during the construction process. Wear appropriate safety gear, including safety glasses, dust masks, and hearing protection. Use caution when operating power tools and follow the manufacturer's instructions carefully. Ensure the hutch is stable and secure once assembled to prevent tipping or accidental injury.

Creating a DIY hutch is a rewarding project that allows for personalization and creativity. By carefully planning the design, selecting appropriate materials, and following safe construction practices, you can build a beautiful and functional piece of furniture that will enhance your home for years to come.

Share:

Step-by-Step Woodwork Bench Plans for Every Workshop

Build Your Dream Woodworking Bench: A Step-by-Step Guide

Hey there, fellow woodworkers! So you're thinking about building your own workbench? Fantastic! There's nothing quite like the satisfaction of crafting a tool that will help you craft so many other things. This isn't just a bench; it's an investment in your woodworking journey. This guide will walk you through building a sturdy, versatile workbench perfect for any workshop, regardless of size. We'll break it down step-by-step, making it manageable even for beginners. Grab your coffee, let's get started!

Planning Your Perfect Bench

Before we jump into the sawdust, let's plan our masterpiece. Think about how you'll use your bench. What kinds of projects will you be tackling? A bench for intricate jewelry boxes will have different needs than one for building massive furniture.

Choosing Your Wood

This is a big one. Hardwoods like maple, oak, or beech are ideal for durability and resistance to dents and scratches. They're pricier, but worth it in the long run. Softwoods like pine or fir are more budget-friendly but might need more reinforcement. Consider your budget and the type of work you'll be doing. Don't forget to check your lumber for knots and warping; you want straight, clean boards for a solid bench.

Dimensions and Design

There's no one-size-fits-all answer here. A good starting point is a bench around 24-36 inches wide and at least 6-8 feet long. Think about your workspace and how much room you have. Height is crucial too – aim for a height that's comfortable for you, usually around waist height. You can easily adjust this based on your own preference. We'll be building a classic, robust design, but feel free to customize!

Gathering Your Tools

Before you even start cutting, make sure you have all your tools ready. You'll need the basics:

  • Measuring tape
  • Pencil
  • Circular saw (or hand saw – it'll take longer, but it's doable!)
  • Drill with various drill bits
  • Screwdriver (or impact driver – a game-changer!)
  • Clamps (lots of them!)
  • Safety glasses
  • Hearing protection
  • Wood glue
  • Wood screws (various sizes)
  • Level
  • Chisel (optional, but handy)
  • Sandpaper (various grits)

Having all your tools organized and within easy reach will save you time and frustration.

Building the Benchtop

Let's start with the heart of the workbench – the top! This section will detail building a strong and durable benchtop.

Creating the Frame

Start by building a sturdy rectangular frame from your chosen lumber. Use strong, long boards for the sides and shorter ones for the ends. Make sure the corners are square and secure using wood glue and screws. Remember to pre-drill your screw holes to prevent the wood from splitting.

Laying the Top Boards

Once the frame is solid, it's time to add the top boards. Arrange them evenly across the frame, leaving a small gap between each board for expansion and contraction. Use more wood glue and screws to secure them to the frame. Tightly clamping the boards while the glue dries is essential for a solid top.

Finishing the Top

After the glue is dry and everything is secure, it's time to sand the top. Start with a coarser grit sandpaper and gradually move to finer grits for a smooth finish. You can then choose to apply a finish, like varnish or polyurethane, to protect your benchtop from wear and tear.

Building the Base

Now for the support structure. A sturdy base is critical to the functionality of your bench. We're going for a classic leg-and-stretcher design.

Constructing the Legs

Cut your legs to the desired height. Remember, comfort is key! Make sure they are perfectly square and plumb. If you have a woodworking vice, it might be helpful to use it to hold everything in place while working with the screws.

Attaching the Stretchers

These horizontal supports connect the legs, adding incredible strength and stability. Attach them using wood glue and screws. Ensure that the stretchers are level and evenly spaced.

Attaching the Base to the Top

Carefully lift the benchtop and place it on top of the assembled base. Use screws from the underside to attach the top to the base. Pre-drilling is crucial here to prevent cracking.

Adding Extra Features (Optional)

Want to take your workbench to the next level? Here are some optional additions:

  • Vises: A front vise is a game-changer for clamping down workpieces. Consider adding a tail vise to the back as well.
  • Dog holes: These holes allow you to use bench dogs for clamping and securing work.
  • Shelves: Add shelves for extra storage.
  • Drawers: Built-in drawers provide even more storage capabilities.

Finishing Touches

Once your bench is assembled, take the time to sand any rough edges and apply a final finish. A coat or two of varnish or polyurethane will protect your wood and make it easier to clean.

Commonly Asked Questions

Q: What kind of wood screws should I use? A: Use exterior-grade wood screws, as they are more resistant to moisture.

Q: How important is it to use a level? A: Very important! A level bench is essential for accuracy and safety.

Q: Can I build this bench without power tools? A: Yes, but it will require more time and effort. Hand tools are perfectly capable of creating a sturdy workbench, just expect the process to take significantly longer.

Q: What's the best finish for a workbench? A: It depends on your preferences and the type of work you'll be doing. Polyurethane is a popular choice for its durability and water resistance.

Q: How long does it take to build this bench? A: This depends on your skill level and the tools you're using. Expect to spend anywhere from a weekend to a few weeks.

And there you have it! You've now got the knowledge and the plan to build your very own woodworking bench. Remember to take your time, enjoy the process, and don't be afraid to make adjustments to fit your needs. Happy building!

Share:

人気の投稿

Powered by Blogger.